RFI OVERVIEW
Sitearound’s RFI tool aims to facilitate communications among project stakeholders.
1. To view Sitearound’s RFI feature, click “RFI” on the side menu.
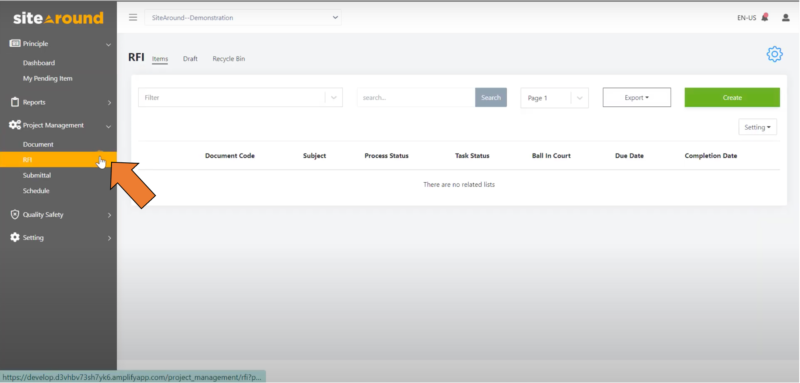
2. All of your RFI items will then be displayed.

Training Center > RFI

Determine who receives access to which information through a powerful RFI feature. This allows for easy communication among all project stakeholders.
Sitearound’s RFI tool aims to facilitate communications among project stakeholders.
1. To view Sitearound’s RFI feature, click “RFI” on the side menu.

2. All of your RFI items will then be displayed.

1. To create an RFI, click “RFI” on the side menu.

2. Click on “Create” on the top right-hand corner of your screen on the RFI menu.
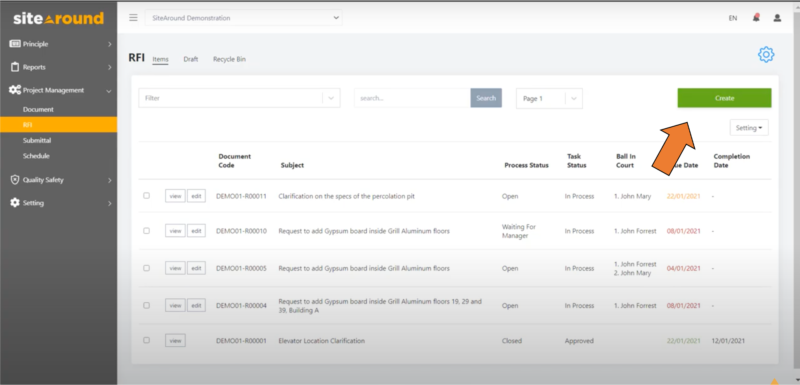
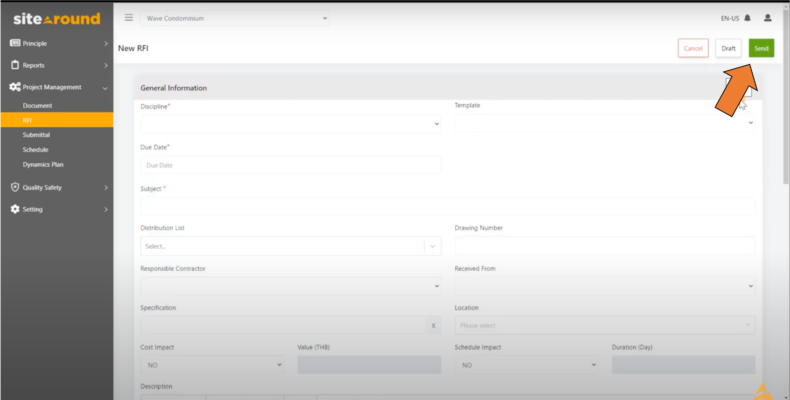
3. Fill out the necessary details and your request.

4. When complete, click “Send” on the top right-hand corner of your screen.
1. To edit an RFI, click “RFI on the side menu.

2. Click on the “Edit” button next to each RFI.

3. After making changes, click “Save.”

1. To delete an RFI, click “RFI” on the side menu.

2. Then, click on “View” next to the RFI.

3. Next, click “Delete” on the top right-hand corner of your screen.

1. To manage your RFI settings, click the gear icon on the top right-hand corner of your screen.
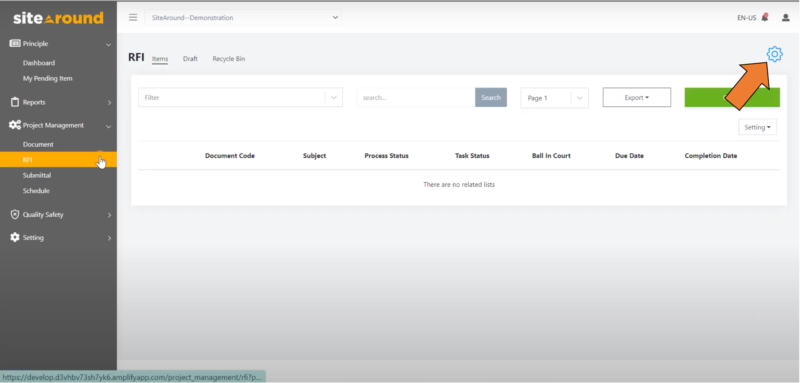
2. The first setting is the Default setting which allows you to set up a Default RFI Manager to review all RFIs.

3. The next setting is the Email Notification setting which allows you to manage who will receive what RFI-related notifications.

4. The final setting is the Template setting which allows you to customize the workflow of RFI templates.

5. When complete, click “Save” on the top right-hand corner of your screen.

1. To set up a default RFI manager, select “RFI” on the side menu.

2. Click on the gear icon on the top right-hand corner of your screen to manage your RFI settings.

3. Select the person you’d like to name as the Default RFI Manager.

4. Then, select the Duration (in days) that this person is required to review the RFI.

5. When complete, click “Save” on the top right-hand corner of your screen.

1. To manage RFI notifications, click “RFI” on the side menu.

2. Click on the gear icon on the top right-hand corner of your screen to manage your RFI settings.

3. Under the Email Notification setting, select the boxes in the table to match your needs.

4. When complete, click “Save.”

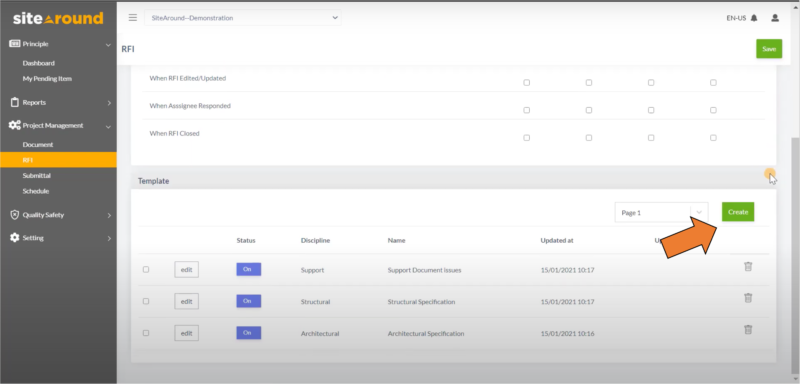
1. To set up your RFI template settings, click “RFI” on the side menu.

2. Click on the gear icon on the top right-hand corner of your screen.

3. Click on “Create” on the right-hand corner above the Template setting table.
4. Enter the details necessary to your template.
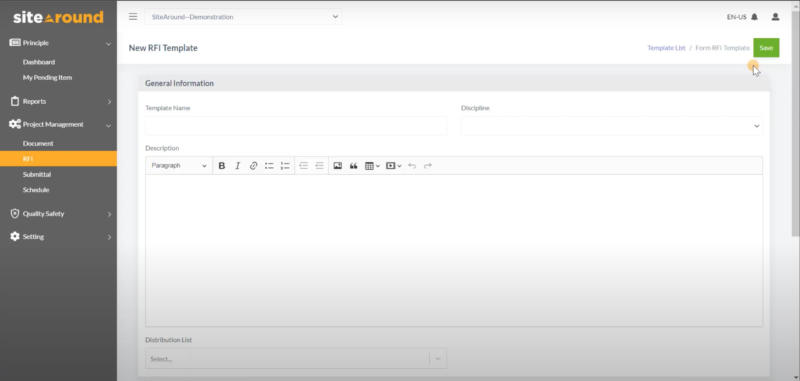
5. Under the Workflow section, add steps an RFI would have to pass through to gain approval.
You can add multiple people to the process.

6. When complete, click “Save” on the top right-hand corner of your screen.

1. To edit an RFI template, click “RFI” on the side menu.

2. Click on the gear icon on the top right-hand corner of your screen to manage your RFI settings.

3. Scroll down to the Template setting section.

4. Click on the “Edit” button next to each template.

5. Edit the details you wish.
6. When complete, click “Save.”

1. To delete an RFI template, enter your project and click “RFI” on the side menu.

2. Click on the gear icon on the top right-hand corner of your screen to manage your RFI settings.

3. Scroll down to the Template setting section.

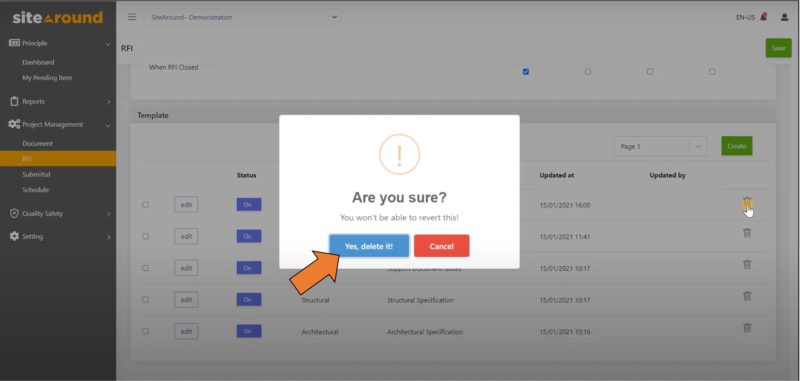
4. To delete a template, click on the trash icon on the right-hand side of each template.

5. Confirm the deletion.
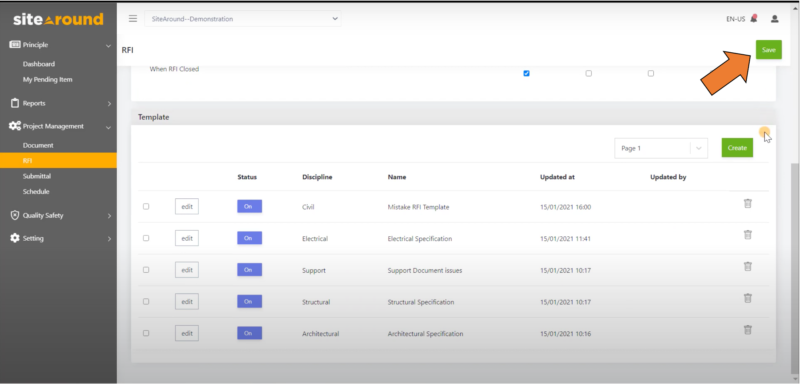
6. When complete, click “Save.”
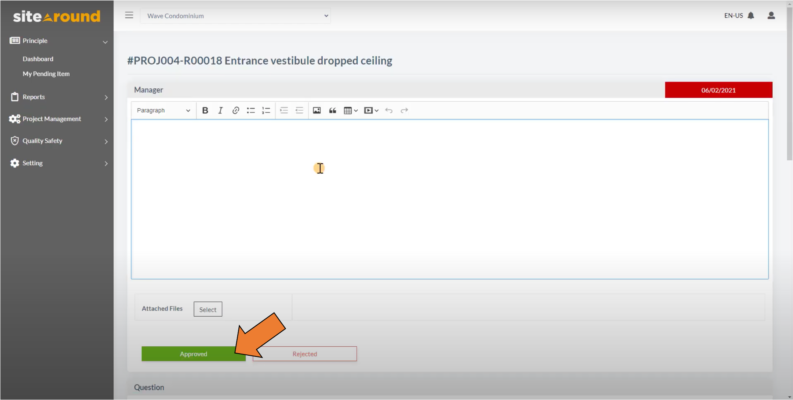
1. To close an RFI, head to “My Pending Items” under “Principle” on the side menu.

2. Click on the item you wish to close.

3. The manager can add additional comments or even make mark ups to the file from here.

4. When complete, the manager can select “Approved” or “Rejected” to have the final say on whether an RFI shall be closed.
Closing an RFI means it has already been answered.
For help contact us anytime, or read our blog for construction’s latest insights